Features
Growing Media
Inputs
Special Series: growing in the rootzone #12
November 21, 2012 By Andrew Lee
Everyone is now focused on preparing for the new crop, and for a clean start it is essential that the greenhouse is disinfected properly. Some useful tips on how to structure this operation can be found in the fact sheet “Cleaning the greenhouse (www.grodan.com/user+advice).
 |
|
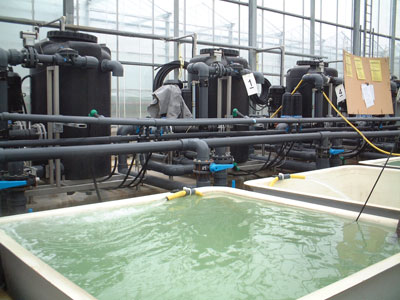
| Irrigation units need preventive maintenance. Advertisement
|
However, in order to live up to society’s expectations for a more sustainable greenhouse sector, we must now think responsibly in terms of how the waste solution from the cleanup is treated. The waste solution will contain chemicals harmful to the environment and plant growth so it should be discharged in an environmentally friendly way – in line with local regulations – and above all should be prevented from entering surface water.
MAKE SURE DRAIN BASINS ARE PROPERLY RINSED
■ When cleaning the drain basins, make sure these are properly rinsed and are free of chemicals prior to the start of the new crop. Keeping the drain basins free from chemicals used during cleanup and ensuring that the irrigation system has been properly flushed with clean water will allow you to recycle nutrient solution from the very beginning of the new crop, in short minimizing fertilizer (N-NO3, P-PO4) emission to the environment as well as reducing input costs.
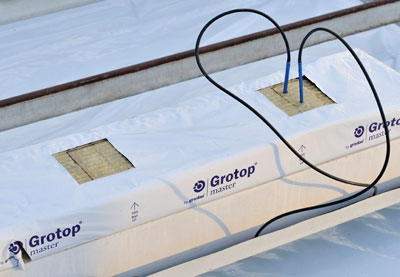
When new stone wool slabs are brought into the greenhouse, and placed on hanging gutters or on the ground, they should be saturated with complete nutrient solution, the EC of which will be dependent on the crop and individual growing circumstances.
For winter-planted crops, the slabs should remain fully saturated for at least 24 hours before the drain hole(s) are cut. For maximum drain efficiency, Grodan recommends one drain hole per linear 133 cm slab length. This should be made at the lowest point in the slab and should be opened sufficiently to allow excess water to drain away easily.
 |
For more information on how to cut the drainage holes and some examples, see the sidebar story (Pg. 44). When the drain hole(s) are cut, approximately 2.0 litres of balanced nutrient solution will flow from a slab with dimensions of 100 x 15 x 7.5 cm (Tables 1 and 2 on page 44).
Remember that no chemicals harmful to plant growth are released from Grodan slabs, so it is perfectly safe to collect and recycle this solution, a fact that has already been communicated by LTO Groeiservice in 2010. (LTO Groeiservice is an independent Dutch organization working on behalf of its grower and supplier members to increase business by encouraging collective development and knowledge exchange.)
A NUMBER OF WAYS TO CONFIGURE DRAIN HOLES
■ To ensure that you collect 100 per cent of the initial drain volume, the drain holes may be configured in a number of ways (Figure 1 on page 44).
Cutting the final drain hole directly: this will result in a large flow of water (Figure 1 yellow line), so it is advisable to start cutting the drain holes from slabs located at the lowest point on the gutter to prevent the drainage channels from overflowing. Remind your staff when they cross the central pathway to think again at which end of the row the lowest drainage point is situated.
 |
|
| Figure 1
|
Draining the slab slowly: this is achieved by first making a small (1 cm) cut in the bottom of the slab to allow the water to flow out slowly before the final hole is cut (Figure 1 blue line). This allows the drain collection system to handle the large volume of water over a longer period of time and therefore prevents the channels from overflowing.
Cutting the drain hole in two stages: this is achieved by puncturing a small hole halfway up the slab so that only the top 50 per cent will drain (Figure 1 red line).
THE BEST TIMING FOR SUBSEQUENT CUTS
■ In the graphic, the second hole was cut after 20 minutes so the same cumulative drain volume is achieved as with the other methods. However, in practice, the second cut can be performed after two or three weeks. Therefore the remaining nutrient solution will be available for the crop, allowing irrigation during Phase 2 to be minimized, facilitating a generative irrigation strategy, the final cut being made in the bottom of the slab when the EC needs to be levelled.
Obviously this strategy will also result in a lower cumulative drain volume due to uptake by the crop. However, please note Grodan recommends this strategy for tomato crops only; if you have any doubt, contact your local Grodan advisor.
Figure 1: The effect of drain hole configuration on volume of first flush from Grodan slabs. If you are hesitant about recycling from Day One and would like further advice, speak with your local Grodan advisor.
Cleaning the greenhouse (http://gr-via.inforce.dk/user+advice/preparing+for+a+new+crop)
Cutting the drain holes
Only cut the drain holes when the slabs are fully saturated.
 |
- The best way to reduce emission of fertilizer to surface water is to recycle the drain solution from Day One. When the drain holes are cut, excess nutrient solution will flow into the drain channels. This solution will be clear, allowing UV systems to work effectively, and will be perfectly balanced. Therefore, provided the distribution system has been properly flushed with clean water, it is perfectly safe to capture and reuse this solution on the new crop.
- The drainage holes can be cut 24 hours prior to planting. For optimum results, it is advised to place the knife underneath the slab and make the cut in an upward direction. This will also avoid tearing the floor covering if hanging gutters are not used.
- The opening should measure 3 cm. To ensure the drain opening does not become blocked during the cultivation cycle, widen the opening with your fingers. Never create a reservoir of “dead” water at the bottom of the slab. This will limit root development and root function. One drain point is required per 133 cm slab. For slabs longer than 133 cm in length, one or two drain holes can be cut, based on the preference of the grower. Please note that more drain holes will make it harder to resaturate the water content in the slab in Phases 3 and 4. Also more drainage is needed to level the EC in the slabs. Especially in the steerable “Next Generation” assortment, the number and position of drain holes are important to focus on. More information on the Grodan 6-Phase model is available at www.grodan.com.
- The closest distance between first dripper and drain hole defines the water behaviour in the slab. The wider the distance, the more refreshment and resaturation can take place in the slab. In the “Next Generation” assortment, the advice is at least 20 cm.
- The cut should be made at the lowest point at the end of the slab in the direction of the slope. In case of an uneven profile, extra drainage holes will be required, once the slabs have settled at the lowest point. Never make the drainage holes directly underneath a propagation block or extra irrigation pin.
- Also, be aware of block positioning at inter-plantings on the same slab or the position of an extra dripper in the middle of the slab.
Print this page